There are so many professionals who use Google Sheets every day to keep track of business activities. Think of businesses that work on appointments, such as: medical centers, estheticians, opticians, physical therapists, etc. Usually, on call with the client, they make a note of the date and time of the appointment and then send a confirmation message on WhatsApp or email.
How great would it be to automatically send a booking confirmation message on WhatsApp?
Spoki allows you to do exactly that: send a message on WhatsApp after editing the contents of a box in the Google Sheets sheet.
In this article we will see how to integrate Google Sheets to Spoki and how to send a confirmation message to the customer, on WhatsApp, automatically.
Step 1: Select on Zapier the first tool: Google Sheets.
To connect the two tools (Google Sheets and Spoki) we need a connector, in our case we will use Zapier.
Zapier is an online tool that allows many apps (e.g., Gmail, Google Calendar, Google Sheets, Slack, Mailchimp, Hubspot, Dropbox, Instagram, Spoki, and many others) to be linked together to create automation flows even in the absence of native integration.
As a first step we will need to create a new Zap and select the first tool (in this case Google Sheets) and proceed with its configuration.
This way it will be Google Sheets, or rather, its changes, that will determine the start trigger.
We then select the Event Trigger, which in this case will be New or Updated Spreadsheet Row (Team Drive).
We indicate the Google account to be used and go on to select the Google Sheets we intend to use.
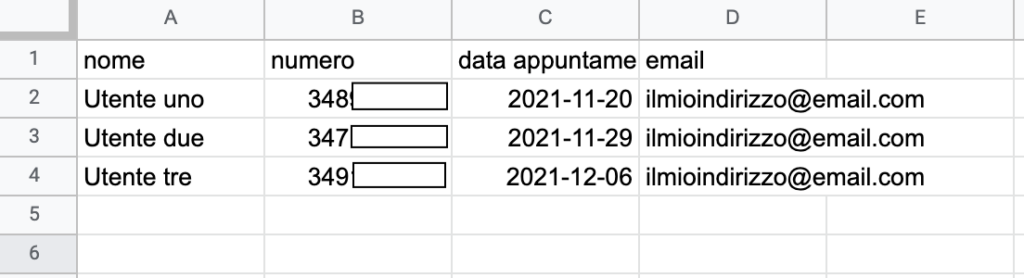
As the Trigger Column we can choose the column that will act as the trigger. In our case it will be “Date Appointment.”
N.B. The name given to the column must be identical to the dynamic field created in the Spoki platform.
Let’s test that everything works correctly with the trigger test.
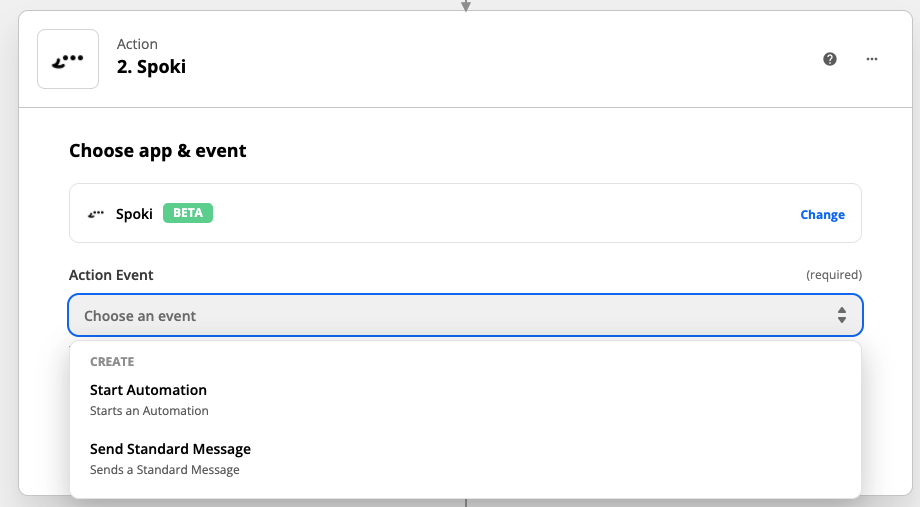
Step 2: Select on Zapier the second tool: Spoki
We choose the action to be performed by Spoki as a result of the trigger.
We select the “Start Automation” item.
With “Start Automation” we can start a message that aims to start a conversation with the user.
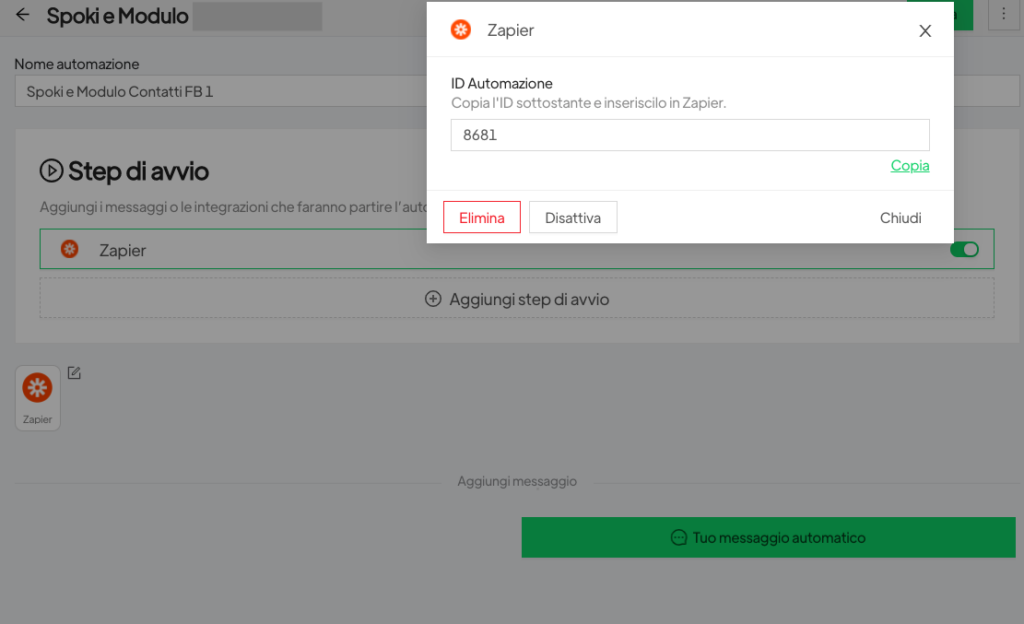
Step 3: Create the automation on Zapier.
Let’s create a new automation on Spoki and select as the Startup Step: Zapier.
Automatically the system will generate an automation ID code called Automation ID. We copy the ID code and close the window.
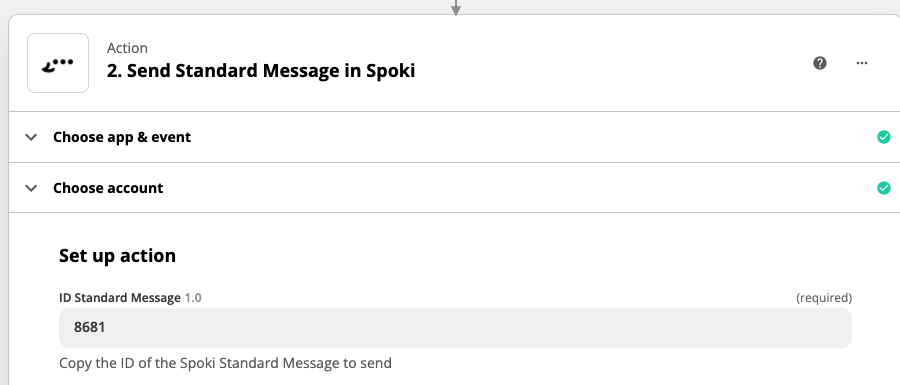
We select on Spoki the template to be sent to the user with the respective dynamic fields. In our case the dynamic field used in the template will be “Date Appointment“. In this case the dynamic field will be populated with information closely related to the recipient of the message.
Let’s go back to Zapier and paste the code we saved inside the ID Standard Message entry.
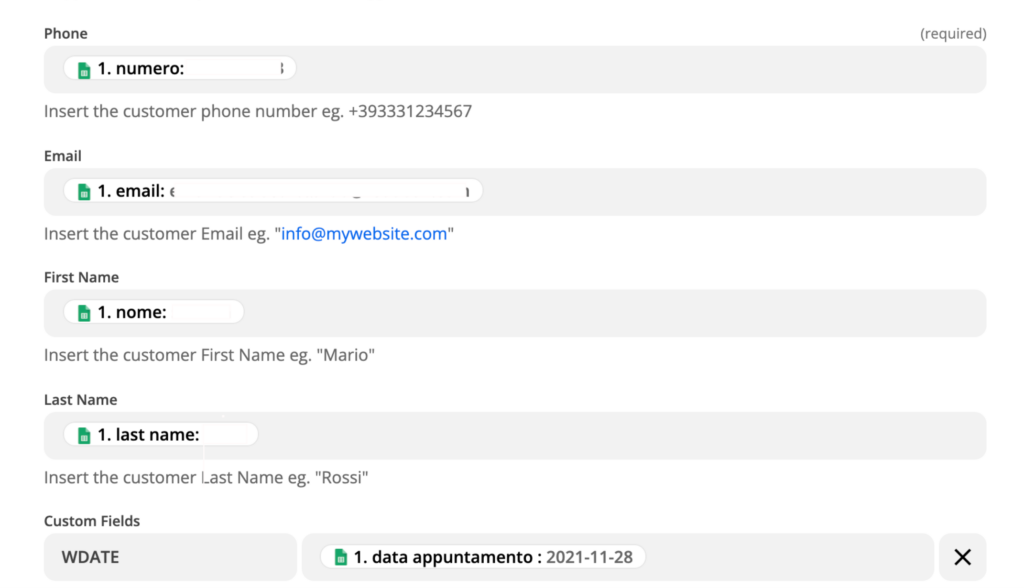
Next we match the data we intend to share from the Google Sheets sheet to Spoki.
From now on, whenever you edit the contents of a Google Sheets cell in the “appointment date” column, the user who is the subject of the change will automatically receive the appointment confirmation message, with the updated dynamic field, on their WhatsApp number.
With the Spoki platform, you can also send an appointment reminder to the customer a few minutes-hours-days before the start of the event using “Condition on Date and Time” as the automation trigger, click here to learn more!
Make your communication more effective and be closer to your customers’ needs.